Top 10 Tips For Removing Stains
Plus Glossary Of Terms And Techniques
Removing stains does not need to be complicated, but it is always best to understand the basics. Therefore, here are the top ten tips for successfully getting rid of spots and spills from a variety of surfaces.
Tip 1: Treat It Quickly - You are most likely to be able to successfully remove stains if you treat them as quickly as possible. Every second counts.
As soon as you see a spill blot it up immediately, and take additional measures to make sure it does not set.
That's why I suggest, before you experience a spill or stain you get yourself ready by making a stain removal kit and get all the necessary equipment and tools you need.
Tip 2: Blot It - Don't Rub It! - When treating stains your first instinct may be to rub the carpet, clothing or upholstery fibers vigorously to scrub out the offending mark or spot, but resist the urge.
The best technique for removing stains is to blot at it with a clean white cloth so that the staining material does not get pushed furher into the fibers or other surface. Instead, when you blot your goal is to transfer as much of the spill or drip into the white cloth you are blotting with.
Tip 3: Know What Type Of Stain It Is Before Treating It - It is always best to know what type of spot or spill you are treating before you begin, such as ballpoint ink or barbecue sauce. This allows you to plan how you will remove it, using the appropriate steps for that partiular type.
My A-Z Stains Guide gives you step by step instructions for removing over 100 types of stains, so this can be a great resource for you.
If you can't figure out what the heck has caused your spot though, which sometimes happens, try these techniques for how to remove mystery stains.
Tip 4: Make Sure Your Technique Is Appropriate For Your Surface - Not only do you need to know what type of stain you have, but you also need to pay attention to what surface it is on, such as washable clothing, carpet, the wall, wood, leather, etc. While removing stains with one technique may be safe for one surface, it may ruin another.
I've created a list of the top nine stain removal techniques you should use in most situations, with explanations of how to do them, and when they're most useful. That article should help you immensely in making sure you do it the right way, the first time.
In addition, this site makes a point of explaining what treatments work on which types of spots and what surfaces, since I know how important this is, so use this information to help you out when removing stains yourself.
Tip 5: Follow Care Label Instructions - Many items, including clothing, have care label instructions for how they can be cleaned. In addition, upholstery generally have cleaning tags too.
Follow these instructions when removing stains and you are much less likely to ruin your item with your efforts.
Tip 6: Start With The Most Conservative Method First, And Only Go To The Harsher Treatments If Needed - You don't want to bring out the big guns first thing if simply rinsing the item and presoaking will remove the mark, for example. That is because the more harsh the treatment the more likely your item will get ruined in the process.
Also, remember to be patient during the process or removing stains. You may have to try a couple of things before you find the one that works for your spot.
Tip 7: Do Not Combine Products & Solutions - Although you may need to try several different methods for removing stains, as stated above, you should not be combining different stain removers together in an attempt to do it.
This can cause adverse chemical reactions, such as formation of a toxic gas when you combine bleach and ammonia.
To avoid this thoroughly rinse and remove one treatment product before trying another one.
Tip 8: Check For Colorfastness - Especially when you start dealing with harsher treatments for removing stains the products you are using may change the color of the fabric or fiber you are trying to treat.
There is nothing worse than a bright white spot on a red t-shirt where the stain remover yes, removed the stain, but also the red dye in the shirt, for example.
To avoid this problem always follow these instructions for how to test for colorfastness in an inconspicuous area of clothing, carpet or upholstery before using the product on the stained area.
Tip 9: Always Check To Make Sure The Stain Is Removed Before You Place It In The Dryer - Nothing sets a stain worse than drying it in a dryer.
If your method for removing stains does not completely get rid of it after it has gone through the wash try another method right away, before placing it in the dryer.
Or, if that is not possible, such as if you don't have enough time to deal with it right away, at the least let it air dry instead of placing it in the dryer. That way you will have a better shot at removing the spot later, with another method.
Tip 10: Some Stains Just Won't Come Out - Try as you might some spots and spills just won't come out, for reasons beyond your control. They are permanent.
You must be patient when working through the removing stains process, but also accept that some items are just a lost cause, and there's nothing you can do about it. Instead, toss it or make it into a rag for your cleaning, and just enjoy the rest of your day.
Major Categories Of Stains To Watch Out For
Finally, now that you know the top 10 rules for removing stains, here are some additional articles about the major categories of stains to watch out for.
These aren't necessarily a specific type, but instead common categories based on season or holiday, where you're likely to get particular spots or spills, or groups of stains where they share some common characteristic.
 Baby |
 Halloween |
 Thanksgiving |
 Valentine's Day |
Thanks For Visiting My Website: Grab Your Free Gift!

Hi, I'm Taylor, a busy mom with 3 kids, so I have lots of hands on experience with house cleaning, laundry and my fair share of spots, spills and other messy catastrophes. Thanks for visiting my site.
I update the website all the time with tips, tutorials, cleaning recipes, reviews of products from readers like you, and tests I've done on various cleaners, removers and laundry supplies.
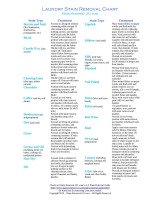
I'd love to give you a gift! When you subscribe to my free weekly newsletter you will receive a free printable laundry stain removal chart that you can reference as needed.
I hope you enjoy this gift, and stop by again soon!
Related Pages You May Enjoy
Get Stain Removal Help And Frequently Asked Questions
100's Of Stain Removal Tips & Tricks
Go From Removing Stains: Glossary Of Terms And Techniques To Home Page
CAUTION: This website is provided for informational purposes only. It is provided as is, without warranties or guarantees. Some stains and messes just won't come out, and are permanent. Further, some cleaning methods can harm your item, so if what you want to clean or launder is sentimental or expensive call a professional. See disclaimer of liability for more information.
Let's Stay Connected!
Get Free Email Updates
(and get a FREE printable)
Related Pages
 A-Z Guide: Instructions For 100 Types
 Stain Removal Products Reviews
 Visit Household Management 101
 Visit Home Storage Solutions 101

Share Your Comments, Tips & Ideas